Column Name
|
Data Type
|
CustID
|
Number (Long Integer)
|
LastName
|
Text (50)
|
FirstName
|
Text (50)
|
Address
|
Text (50)
|
City
|
Text (25)
|
State
|
Text (2)
|
Zip
|
Text (5)
|
PhoneNumber
|
Text (10)
|
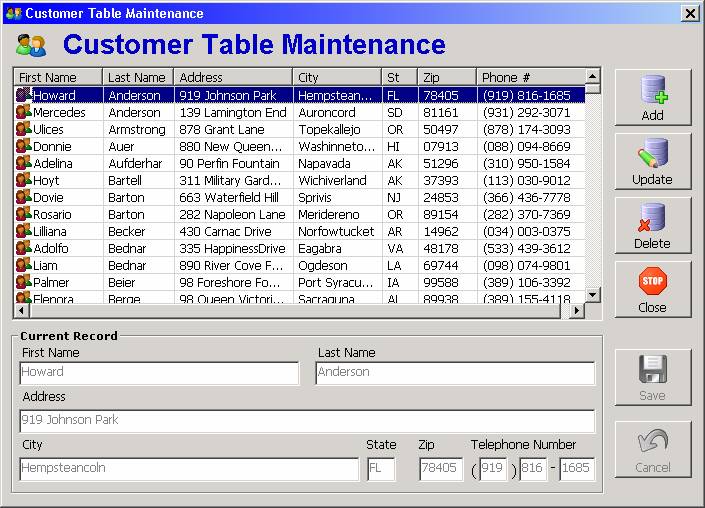
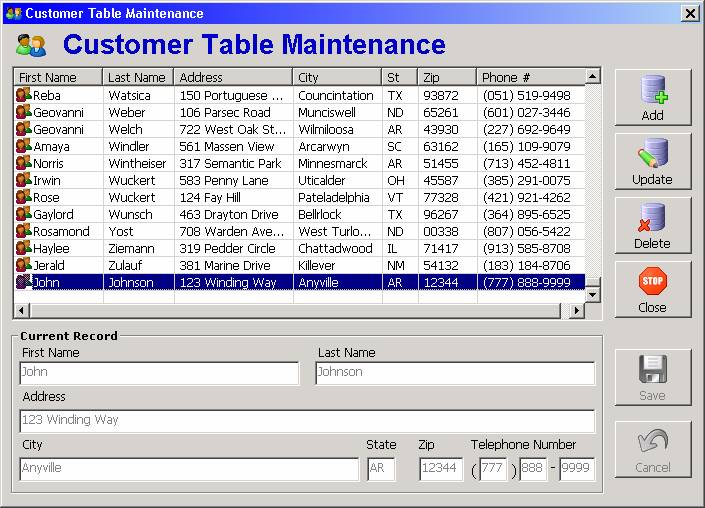
Initially, this screen is in "read-only" mode; only the list portion is active. The data entry fields on the bottom half of the screen are grayed out are not enterable. The buttons to add, update, and delete are available; the buttons to save or cancel are not available.To add a customer, click the "Add" button. This will enable the fields on the bottom half of the screen. The buttons to add, update, and delete will become unavailable; the buttons to save or cancel will be available. A screen-shot of the screen in this state is shown below:
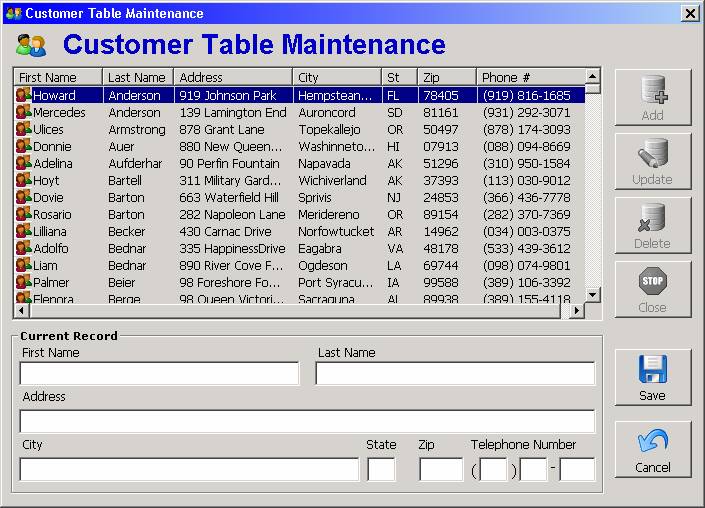
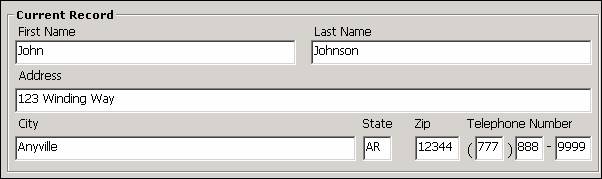
You can then enter the values for the new record:
When you are done entering data into the fields, click the Save button, which will cause the new record to be added to the list and will cause the screen to revert back to its initial "read-only" state. A screen-shot of the screen in this state is shown below:
To modify data for an existing customer record, click the customer record in the list to highlight it and click the "Update" button. This will enable the fields on the bottom half of the screen. The buttons to add, update, and delete will become unavailable; the buttons to save or cancel will be available. When you are done changing the data in the fields, click the Save button, which will cause the record to be updated in the list and will cause the screen to revert back to its initial "read-only" state.
To delete a customer record, click the customer record in the list to highlight it and click the "Delete" button. The following message will be displayed:
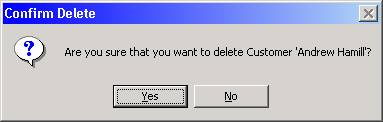
Responding "Yes" to the confirmation prompt will cause the applciation to delete the record and remove it from the list.
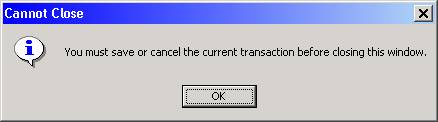
To exit the Customer Maintenance screen, click the "Close" button when the screen is in its "read only" state. The Close button will not be available when you have an "add" or "update" pending. If you attempt to close the screen with the Windows "X" button while you have an "add" or "update" pending, the following message will be displayed:
Highlights of the code, as it relates to ADO, are presented below.
Three ADO object variables (representing and ADO Connection, Command, and Recordset, respectively) are declared at the form level. This a one-form application (with a handful of supporting modules), so in this case, form-level scope is serviceable.
Private mobjConn                As ADODB.Connection
Private mobjCmd                 As ADODB.Command
Private mobjRst                 As ADODB.Recordset
The database is opened in the "ConnectToDB" Sub.
First, the Connection object variable mobjConn is instantiated by setting it to New ADODB.Connection. Then the ConnectionString property is set. A difference between this sample application and the ones in the previous topic is that this application uses a DSN-less connection meaning that the steps we went through in the previous ADO examples to set up a DSN are NOT required here. As you may recall from the previous examples, using a DSN connection in your code requires that a DSN be set up on the computer that your program is running on. This restricts where your code can run. On the other hand, a DSN-less connection specifies all the parameters necessary to connect to the database and allows your program to be run on different machines without having to set up a new DSN.
In the case of our sample application, two parameters are required to connect to the Access database: first, the Provider parameter (which specifies Microsoft.Jet.OLEDB.4.0; and second, the Data Source parameter, which specifies the full path of the Access mdb file. In the case of this sample application, it is expected that the mdb file reside in the same folder as the VB project files, or, if this application is compiled, the database should reside in the same location as the executable (.exe) file. The application path is returned by the programmer-defined function GetAppPath (which contains the code to use the App.Path built-in function and append the backslash to it if necessary). Note that the syntax of the ConnectionString requires each parameter name to be followed by an equal sign (=) followed by the value. Each parameter name / value pair is separated by a semicolon (;). Embedded spaces in the parameter names and values are evaluated properly. For example, if your application was located in the folder "C:\My VB Apps\Database Apps", the content of the ConnectionString would be:
Provider=Microsoft.Jet.OLEDB.4.0;Data Source=C:\My VB Apps\Database Apps\Cust.mdb"
Note: If you connect to other databases such as Oracle or SQL Server, different parameters (such as Server,UID, and PWD) will be required; however the syntax rules described above still apply.
After the ConnectionString has been set, the Open method is then used to open the connection to the database.
The Command object mobjCmd is then instantiated by setting it to New ADODB.Command. The Command object represents a command to execute against a database. Command objects are often used to create recordsets or execute action queries. A Command object must use a Connection, either by establishing its own, or by using an existing connection. To use an existing connection, set the Command object's ActiveConnectionproperty to the open Connection object, as shown in the code below. This routine also sets the Command object's CommandType property, which tells ADO how to interpret the contents of the CommandText property (which we will be setting to SQL statements in various places in the application). Since this application will always be passing the Command object a textual SQL string, the value is set to the constant adCmdText(other possible values for CommandType include adCmdTable, which would cause the CommandText to be evaluated as a database table, and adCmdStoredProc, which would cause the CommandText to evaluated as the name of a stored procedure).'-----------------------------------------------------------------------------
Private Sub ConnectToDB()
'-----------------------------------------------------------------------------
Set mobjConn = New ADODB.Connection
mobjConn.ConnectionString = "Provider=Microsoft.Jet.OLEDB.4.0;" _
& "Data Source=" _
& GetAppPath _
& "Cust.mdb"
mobjConn.Open
Set mobjCmd = New ADODB.Command
Set mobjCmd.ActiveConnection = mobjConn
mobjCmd.CommandType = adCmdText
End Sub
In the "LoadCustomerListView" Sub, the contents of the Customer table is loaded into the listview. First, a SQL SELECT statement is built in the String variable strSQL. The String variable strSQL is then assigned to the CommandText property of the Command object with the statement
mobjCmd.CommandText = strSQL
Following this, the Recordset object mobjRst is then populated by assigning it the result of the Execute method of the Command object in the statement
Set mobjRst = mobjCmd.Execute
Note: A Recordset object created with the Command.Execute method always creates a forward-only, read-only recordset ("firehose" cursor).
The code then loops through the recordset, populating each row of the listview. At the bottom of the Sub, the recordset object is set to Nothing, which disconnects it from the database. All manipulations of the data from the point on are handled through the listview, until it is time to update or insert a record back into the database.
It should be noted that the process of loading the entire contents of a table into a listview in this fashion works well for tables with a small number of rows you do not want to do this for recordsets containing thousands of rows.
'-----------------------------------------------------------------------------
Private Sub LoadCustomerListView()
'-----------------------------------------------------------------------------

    Dim strSQL      As String
    Dim objCurrLI   As ListItem
    Dim strZip      As String
    Dim strPhone    As String

    strSQL = "SELECT FirstName" _
           & "     , LastName" _
           & "     , Address" _
           & "     , City" _
           & "     , State" _
           & "     , Zip" _
           & "     , PhoneNumber" _
           & "     , CustID" _
           & "  FROM Customer " _
           & " ORDER BY LastName" _
           & "        , FirstName"

    mobjCmd.CommandText = strSQL
    Set mobjRst = mobjCmd.Execute

    lvwCustomer.ListItems.Clear

    With mobjRst
        Do Until .EOF
            strPhone = !PhoneNumber & ""
            If Len(strPhone) > 0 Then
                strPhone = "(" & Left$(strPhone, 3) & ") " _
                         & Mid$(strPhone, 4, 3) & "-" _
                         & Right$(strPhone, 4)
            End If
            Set objCurrLI = lvwCustomer.ListItems.Add(, , !FirstName & "", , "Custs")
            objCurrLI.SubItems(mlngCUST_LAST_IDX) = !LastName & ""
            objCurrLI.SubItems(mlngCUST_ADDR_IDX) = !Address & ""
            objCurrLI.SubItems(mlngCUST_CITY_IDX) = !City & ""
            objCurrLI.SubItems(mlngCUST_ST_IDX) = !State & ""
            objCurrLI.SubItems(mlngCUST_ZIP_IDX) = !Zip & ""
            objCurrLI.SubItems(mlngCUST_PHONE_IDX) = strPhone
            objCurrLI.SubItems(mlngCUST_ID_IDX) = CStr(!CustID)
            .MoveNext
        Loop
    End With

    With lvwCustomer
        If .ListItems.Count > 0 Then
            Set .SelectedItem = .ListItems(1)
            lvwCustomer_ItemClick .SelectedItem
        End If
    End With

    Set objCurrLI = Nothing
    Set mobjRst = Nothing

End Sub
In the "cmdSave_Click" event procedure, depending on whether an add or update has been initiated, a SQL INSERT or UPDATE statement is built with the String variable strSQL. The String variable strSQL is then assigned to the CommandText property of the Command object with the statement
mobjCmd.CommandText = strSQL
The INSERT or UPDATE action query is then executed with the statement
mobjCmd.Execute
Note that the record ID plays an important role. For an add, the new record ID is obtained by calling the programmer-defined function GetNextCustID, which is described a little later below. For an update, the record ID of the currently selected item in the listview is used in the UPDATE statement to update the record. In either case, the contents of the listview is updated approriately to reflect the insert or update.
'-----------------------------------------------------------------------------
Private Sub cmdSave_Click()
'-----------------------------------------------------------------------------

    Dim strPhone        As String
    Dim objNewListItem  As ListItem
    Dim lngIDField      As Long
    Dim strSQL          As String

    If Not ValidateFormFields Then Exit Sub

    strPhone = txtArea.Text & txtPrfx.Text & txtLine.Text

    If mstrMaintMode = "ADD" Then

        lngIDField = GetNextCustID()

        strSQL = "INSERT INTO Customer(  CustID"
        strSQL = strSQL & "            , FirstName"
        strSQL = strSQL & "            , LastName"
        strSQL = strSQL & "            , Address"
        strSQL = strSQL & "            , City"
        strSQL = strSQL & "            , State"
        strSQL = strSQL & "            , Zip"
        strSQL = strSQL & "            , PhoneNumber"
        strSQL = strSQL & "         ) VALUES ("
        strSQL = strSQL & lngIDField
        strSQL = strSQL & ", '" & Replace$(txtFirst.Text, "'", "''") & "'"
        strSQL = strSQL & ", '" & Replace$(txtLast.Text, "'", "''") & "'"
        strSQL = strSQL & ", '" & Replace$(txtAddr.Text, "'", "''") & "'"
        strSQL = strSQL & ", '" & Replace$(txtCity.Text, "'", "''") & "'"
        strSQL = strSQL & ", '" & txtState.Text & "'"
        strSQL = strSQL & ", '" & txtZip.Text & "'"
        strSQL = strSQL & ", '" & strPhone & "'"
        strSQL = strSQL & ")"

        Set objNewListItem = lvwCustomer.ListItems.Add(, , txtFirst.Text, , "Custs")
        PopulateListItem objNewListItem
        With objNewListItem
            .SubItems(mlngCUST_ID_IDX) = CStr(lngIDField)
            .EnsureVisible
        End With
        Set lvwCustomer.SelectedItem = objNewListItem
        Set objNewListItem = Nothing
    Else
        lngIDField = CLng(lvwCustomer.SelectedItem.SubItems(mlngCUST_ID_IDX))

        strSQL = "UPDATE Customer SET "
        strSQL = strSQL & "  FirstName   = '" & Replace$(txtFirst.Text, "'", "''") & "'"
        strSQL = strSQL & ", LastName    = '" & Replace$(txtLast.Text, "'", "''") & "'"
        strSQL = strSQL & ", Address     = '" & Replace$(txtAddr.Text, "'", "''") & "'"
        strSQL = strSQL & ", City        = '" & Replace$(txtCity.Text, "'", "''") & "'"
        strSQL = strSQL & ", State       = '" & txtState.Text & "'"
        strSQL = strSQL & ", Zip         = '" & txtZip.Text & "'"
        strSQL = strSQL & ", PhoneNumber = '" & strPhone & "'"
        strSQL = strSQL & " WHERE CustID = " & lngIDField

        lvwCustomer.SelectedItem.Text = txtFirst.Text
        PopulateListItem lvwCustomer.SelectedItem
    End If

    mobjCmd.CommandText = strSQL
    mobjCmd.Execute

    SetFormState True

    mblnUpdateInProgress = False

End Sub
When we need to add a new record, a new, unique record ID must generated. In this particular sample application, the record ID is defined as a Long Integer in the database. The GetNextCustID function shown below uses the SQL MAX function to find the highest existing value for the CustID field, adds one to it, and returns that value to the caller. It should be noted that if the CustID field was defined as an Access AutoNumber field, the logic of this application would have to be modified accordingly.
'-----------------------------------------------------------------------------
Private Sub cmdSave_Click()
'-----------------------------------------------------------------------------

    Dim strPhone        As String
    Dim objNewListItem  As ListItem
    Dim lngIDField      As Long
    Dim strSQL          As String

    If Not ValidateFormFields Then Exit Sub

    strPhone = txtArea.Text & txtPrfx.Text & txtLine.Text

    If mstrMaintMode = "ADD" Then

        lngIDField = GetNextCustID()

        strSQL = "INSERT INTO Customer(  CustID"
        strSQL = strSQL & "            , FirstName"
        strSQL = strSQL & "            , LastName"
        strSQL = strSQL & "            , Address"
        strSQL = strSQL & "            , City"
        strSQL = strSQL & "            , State"
        strSQL = strSQL & "            , Zip"
        strSQL = strSQL & "            , PhoneNumber"
        strSQL = strSQL & "         ) VALUES ("
        strSQL = strSQL & lngIDField
        strSQL = strSQL & ", '" & Replace$(txtFirst.Text, "'", "''") & "'"
        strSQL = strSQL & ", '" & Replace$(txtLast.Text, "'", "''") & "'"
        strSQL = strSQL & ", '" & Replace$(txtAddr.Text, "'", "''") & "'"
        strSQL = strSQL & ", '" & Replace$(txtCity.Text, "'", "''") & "'"
        strSQL = strSQL & ", '" & txtState.Text & "'"
        strSQL = strSQL & ", '" & txtZip.Text & "'"
        strSQL = strSQL & ", '" & strPhone & "'"
        strSQL = strSQL & ")"

        Set objNewListItem = lvwCustomer.ListItems.Add(, , txtFirst.Text, , "Custs")
        PopulateListItem objNewListItem
        With objNewListItem
            .SubItems(mlngCUST_ID_IDX) = CStr(lngIDField)
            .EnsureVisible
        End With
        Set lvwCustomer.SelectedItem = objNewListItem
        Set objNewListItem = Nothing
    Else
        lngIDField = CLng(lvwCustomer.SelectedItem.SubItems(mlngCUST_ID_IDX))

        strSQL = "UPDATE Customer SET "
        strSQL = strSQL & "  FirstName   = '" & Replace$(txtFirst.Text, "'", "''") & "'"
        strSQL = strSQL & ", LastName    = '" & Replace$(txtLast.Text, "'", "''") & "'"
        strSQL = strSQL & ", Address     = '" & Replace$(txtAddr.Text, "'", "''") & "'"
        strSQL = strSQL & ", City        = '" & Replace$(txtCity.Text, "'", "''") & "'"
        strSQL = strSQL & ", State       = '" & txtState.Text & "'"
        strSQL = strSQL & ", Zip         = '" & txtZip.Text & "'"
        strSQL = strSQL & ", PhoneNumber = '" & strPhone & "'"
        strSQL = strSQL & " WHERE CustID = " & lngIDField

        lvwCustomer.SelectedItem.Text = txtFirst.Text
        PopulateListItem lvwCustomer.SelectedItem
    End If

    mobjCmd.CommandText = strSQL
    mobjCmd.Execute

    SetFormState True

    mblnUpdateInProgress = False

End Sub
For a delete action, after we have confirmed that the user truly wants to delete the record, we set the CommandText property of the Command object directly with the necessary SQL statement as shown below:
mobjCmd.CommandText = "DELETE FROM Customer WHERE CustID = " & lngCustID
The DELETE action query is then executed with the statement
mobjCmd.Execute
Logic is then executed to update the listview to remove the deleted record.
'-----------------------------------------------------------------------------
Private Sub cmdDelete_Click()
'-----------------------------------------------------------------------------

    Dim strFirstName    As String
    Dim strLastName     As String
    Dim lngCustID       As Long
    Dim lngNewSelIndex  As Long

    If lvwCustomer.SelectedItem Is Nothing Then
        MsgBox "No Customer selected to delete.", _
               vbExclamation, _
               "Delete"
        Exit Sub
    End If

    With lvwCustomer.SelectedItem
        strFirstName = .Text
        strLastName = .SubItems(mlngCUST_LAST_IDX)
        lngCustID = CLng(.SubItems(mlngCUST_ID_IDX))
    End With

    If MsgBox("Are you sure that you want to delete Customer '" _
            & strFirstName & " " & strLastName & "'?", _
              vbYesNo + vbQuestion, _
              "Confirm Delete") = vbNo Then
        Exit Sub
    End If

    mobjCmd.CommandText = "DELETE FROM Customer WHERE CustID = " & lngCustID
    mobjCmd.Execute

    With lvwCustomer
        If .SelectedItem.Index = .ListItems.Count Then
            lngNewSelIndex = .ListItems.Count - 1
        Else
            lngNewSelIndex = .SelectedItem.Index
        End If
        .ListItems.Remove .SelectedItem.Index
        If .ListItems.Count > 0 Then
            Set .SelectedItem = .ListItems(lngNewSelIndex)
            lvwCustomer_ItemClick .SelectedItem
        Else
            ClearCurrRecControls
        End If
    End With

End Sub
When the program ends, the DisconnectFromDB sub is called to clean up the database objects. The Command object variable mobjCmd is set to Nothing. The ADO Connection is then closed by issuing the Close method on the Connection object variable mobjConn, and then that object is set to Nothing as well. Note: It was not necessary to "clean up" the Recordset object variable mobjRst, because it was set to Nothing at the end of each Sub in which it was used.
'-----------------------------------------------------------------------------
Private Sub DisconnectFromDB()
'-----------------------------------------------------------------------------

    Set mobjCmd = Nothing

    mobjConn.Close
    Set mobjConn = Nothing

End Sub
Using the ListView Control
In this section of the article, code related to the use of the ListView will be explained. To incorporate the ListView control into your project, you must add the Microsoft Windows Common Controls 6.0 component group to your toolbox (via Project -> Components). This is the same group that includes the ImageList, Toolbar, StatusBar, etc.
In this project, a ListView control named lvwCustomer and an ImageList control named imlLVIcons were added to the form. (If you want to use icons with your ListView, you must store those icons in an ImageList control that will be tied to the ListView control.) An icon representing "customers" was added to the imlLVIcons ImageList; this image was given a Key property of "Custs".
The following properties of the ListView were set at design time:
Property
|
Value
|
Notes
|
View
|
3 lvwReport
|
The ListView is used prominently in the MS-Windows interface. It is used to display the lists of files and folders in the Windows Explorer and My Computer applications. In those applications, you can go to the View menu and specify Large Icons, Small Icons,List, or Details, and the appearance of the file list is modified accordingly. With the VB ListView control, the 0-lvwIcon (the default), 1-lvwSmallIcon, 2-lvwList, and 3-lvwReport settings for the View property correspond respectively to the Windows Explorer / My Computer View menu options listed above. Setting the ListView View property to 3-lvwReport enables the display of data in a columnar, grid-like fashion.
|
LabelEdit
|
1 - lvwManual
|
In a Windows Explorer or My Computer ListView, you know that you can rename a file by clicking once on its text label, then clicking it again. With the VB ListView control, the editing of the text label is possible when the LabelEdit property is set to 0-lvwAutomatic(which is the default). To prevent the user from modifying the data in the text label (which is the first column of the list when using the 3-lvwReport View), the LabelEdit property must be set to 1-lvwManual.
|
FullRowSelect
|
True
|
This is a Boolean property that is applicable only when View is set to 3-lvwReport. If False (the default), only the first column will be highlighted when a row is selected. If True, the entire row will be highlighted when selected.
|
GridLines
|
True
|
This is a Boolean property that is applicable only when View is set to 3-lvwReport. If True, grid lines will border the cells of the ListView. The default is False.
|
On the Property Pages, Image Lists tab, the "Small" Icon Image List was set to imlLVIcons (the ImageList that was added to the form).
In the Form_Load event, a call is made to the programmer-defined Sub "SetupCustLVCols". Here, we set up the columns for the ListView by using the Add method of the ListView's ColumnHeaders collection. The arguments for the Add method, all optional, are: index, key, text, width, alignment, icon. In the code below, only the text and the width arguments are specified. The text argument specifies the text that will appears in the column header. A common technique to specify the width is to use a percentage of the ListView as a whole. In the code below, the First Name will take up 15% of the ListView's width; the Last Name will take up 12%, and so on. In order to prevent a horizontal scroll bar from appearing at the bottom of the ListView, keep the total width under 100% (in the code below, the percentages add up to 98%). (If you want to display many columns, or certain columns must be particularly wide, the total percentage can certainly exceed 100%, in which case a horizontal scroll bar will automatically appear at the bottom of the ListView, and the user will have to scroll to see one or more columns.) Note that you may specify 0 for the column width, in which case you create a "hidden" column, useful for storing data that the user need not see (in this case, the "ID" column). Thealignment property is not specified for any of the columns in the code below, so by default, all of the columns will be left-aligned. The other alignment options are centered or right-aligned. The alignment argument for left, center, and right are specified with the constants lvwColumnLeft, lvwColumnCenter, and lvwColumnRight, respectively. The code for this Sub is as follows:
'-----------------------------------------------------------------------------
Private Sub SetupCustLVCols()
'-----------------------------------------------------------------------------

    With lvwCustomer
        .ColumnHeaders.Clear
        .ColumnHeaders.Add , , "First Name", .Width * 0.15
        .ColumnHeaders.Add , , "Last Name", .Width * 0.12
        .ColumnHeaders.Add , , "Address", .Width * 0.2
        .ColumnHeaders.Add , , "City", .Width * 0.15
        .ColumnHeaders.Add , , "St", .Width * 0.06
        .ColumnHeaders.Add , , "Zip", .Width * 0.1
        .ColumnHeaders.Add , , "Phone #", .Width * 0.2
        .ColumnHeaders.Add , , "ID", 0
    End With

End Sub
Also in the Form_Load event, following the call to "SetupCustLVCols" is the call to the "LoadCustomerListView" Sub. We looked at this Sub earlier to examine the ADO/database aspects of the code; now we will look at it to examine the ListView aspects of the code.
A local ListItem object, objCurrLI, is declared. ListItem objects represent the entries of the ListView; they are the components of the ListView's ListItems collection.
After the recordset has been created, we first use the Clear method to remove all existing ListItem objects from the ListView (this step is technically not needed in the case of this particular application, but it is good practice to do this there could be situations where you need to reload a ListView, and failure to clear the existing items will result in extraneous or duplicate items in the list).
As we loop through the Recordset, for each record we create a new ListItem object by invoking the Add method of the ListItems collection, setting the reference to the new ListItem to the objCurrLI variable. The arguments for the Add method, all optional, are: index, key, text, icon, smallicon. We are using only the text and thesmallicon arguments. The text argument sets the Text property of the ListView; it is the text that will appear in the first column of the ListView (in this case, it is the FirstName field from the recordset). The smalliconargument refers to the image that will appear to the left of each ListItem; here we specify "Custs", which is the Key of the desired image in the imlLVIcons ImageList control (which we tied to this ListView control).
The remaining fields of the recordset are assigned to the corresponding SubItems entries of the current ListItem. Whenever you add more than one ColumnHeader object, you create corresponding SubItem elements that are associated with each ListItem. The SubItems collection is a string array of data associated with a ListItem. ColumnHeaders and SubItems are "1-based" collections however, the upper bound of the SubItems is always one greater than the upper bound of the ColumnHeaders. This is because ColumnHeaders(1)corresponds to the ListItem's Text property; ColumnHeaders(2) through ColumnHeaders(n) correspond to the ListItem's SubItems(1) through SubItems(n 1). Note that constants are used for the SubItem indexes (you could alternatively just use hard-coded numbers to refer to the indexes). These constants were defined at the form-level:
' Customer LV SubItem Indexes ...
Private Const mlngCUST_LAST_IDX          As Long = 1
Private Const mlngCUST_ADDR_IDX          As Long = 2
Private Const mlngCUST_CITY_IDX          As Long = 3
Private Const mlngCUST_ST_IDX            As Long = 4
Private Const mlngCUST_ZIP_IDX           As Long = 5
Private Const mlngCUST_PHONE_IDX         As Long = 6
Private Const mlngCUST_ID_IDX            As Long = 7
After the loop has completed, we then check the Count property of the ListItems collection. As long as at least one record was loaded, we set the SelectedItem property of the ListView to the first ListItem. The SelectedItem property of the ListView is a reference to the ListItem that is currently selected. (Normally, the SelectedItem property is set when the user clicks on a ListItem.) We then call the ListView's ItemClick event (lvwCustomer_ItemClick). The ItemClick event expects a ListItem argument, so we pass it the selected item that we just set. (Normally, the ItemClick event is fired when the user clicks on a ListItem.) We will explore the code for the lvwCustomer_ItemClick event shortly.
The code for "LoadCustomerListView" is shown below, with the ListView-related code in bold:
'-----------------------------------------------------------------------------
Private Sub LoadCustomerListView()
'-----------------------------------------------------------------------------

    Dim strSQL      As String
    Dim objCurrLI   As ListItem
    Dim strZip      As String
    Dim strPhone    As String

    strSQL = "SELECT FirstName" _
           & "     , LastName" _
           & "     , Address" _
           & "     , City" _
           & "     , State" _
           & "     , Zip" _
           & "     , PhoneNumber" _
           & "     , CustID" _
           & "  FROM Customer " _
           & " ORDER BY LastName" _
           & "        , FirstName"

    mobjCmd.CommandText = strSQL
    Set mobjRst = mobjCmd.Execute

    lvwCustomer.ListItems.Clear

    With mobjRst
        Do Until .EOF
            strPhone = !PhoneNumber & ""
            If Len(strPhone) > 0 Then
                strPhone = "(" & Left$(strPhone, 3) & ") " _
                         & Mid$(strPhone, 4, 3) & "-" _
                         & Right$(strPhone, 4)
            End If
            Set objCurrLI = lvwCustomer.ListItems.Add(, , !FirstName & "", , "Custs")
            objCurrLI.SubItems(mlngCUST_LAST_IDX) = !LastName & ""
            objCurrLI.SubItems(mlngCUST_ADDR_IDX) = !Address & ""
            objCurrLI.SubItems(mlngCUST_CITY_IDX) = !City & ""
            objCurrLI.SubItems(mlngCUST_ST_IDX) = !State & ""
            objCurrLI.SubItems(mlngCUST_ZIP_IDX) = !Zip & ""
            objCurrLI.SubItems(mlngCUST_PHONE_IDX) = strPhone
            objCurrLI.SubItems(mlngCUST_ID_IDX) = CStr(!CustID)
            .MoveNext
        Loop
    End With

    With lvwCustomer
        If .ListItems.Count > 0 Then
            Set .SelectedItem = .ListItems(1)
            lvwCustomer_ItemClick .SelectedItem
        End If
    End With

    Set objCurrLI = Nothing
    Set mobjRst = Nothing

End Sub
The ListView's ItemClick event is fired when the user clicks on a ListItem in the ListView. VB passes an argument called Item to the event, which refers to the ListItem that was clicked. In the lvwCustomer_ItemClick event below, we populate the textboxes in the "Current Record" frame of the form with the data from the currently selected ListItem.
'-----------------------------------------------------------------------------
Private Sub lvwCustomer_ItemClick(ByVal Item As MSComctlLib.ListItem)
'-----------------------------------------------------------------------------

    gblnPopulating = True

    With Item
        txtFirst.Text = .Text
        txtLast.Text = .SubItems(mlngCUST_LAST_IDX)
        txtAddr.Text = .SubItems(mlngCUST_ADDR_IDX)
        txtCity.Text = .SubItems(mlngCUST_CITY_IDX)
        txtState.Text = .SubItems(mlngCUST_ST_IDX)
        txtZip.Text = .SubItems(mlngCUST_ZIP_IDX)
        If .SubItems(mlngCUST_PHONE_IDX) = "" Then
            txtArea.Text = ""
            txtPrfx.Text = ""
            txtLine.Text = ""
        Else
            txtArea.Text = Mid$(.SubItems(mlngCUST_PHONE_IDX), 2, 3)
            txtPrfx.Text = Mid$(.SubItems(mlngCUST_PHONE_IDX), 7, 3)
            txtLine.Text = Right$(.SubItems(mlngCUST_PHONE_IDX), 4)
        End If
    End With

    gblnPopulating = False

End Sub
The ListView's ColumnClick event is fired when the user clicks on one of the ListView's column headers. VB passes an argument called ColumnHeader to the event, which refers to the column header that was clicked. What we want to do is sort the ListView by the column that was clicked. The ListView control has three properties related to sorting:
Sorted is a Boolean indicating whether or not the ListView is currently sorted.
SortKey is an integer representing the column currently sorted. Zero specifies that the ListView is sorted on the value of the Text property (i.e., the first column). A number from 1 to the number of SubItems specifies that the ListView is sorted on the value of that SubItem. The SubItemIndex property of the ColumnHeader object returns the appropriate value.
SortOrder is a numeric value indicating whether the sort is ascending or descending. The values can be specified with the constants lvwAscending or lvwDescending.
The first part of the code in the lvwCustomer_ColumnClick event checks to see if the user clicked on the column that the ListView is currently sorted on. If so, it toggles the ascending / descending value. Otherwise, it sorts the ListView on the clicked column in ascending order. The second part of the code makes sure that, if an item was selected prior to the sort, it is still visible after the sort. The EnsureVisible method of the ListItem object checks that the ListItem is currently viewable in the ListView if not, it automatically scrolls the ListView to make it viewable.
'-------------------------------------------------------------------------
Private Sub lvwCustomer_ColumnClick(ByVal ColumnHeader As SComctlLib.ColumnHeader)
'-------------------------------------------------------------------------

    ' sort the listview on the column clicked
    With lvwCustomer
        If (.Sorted) And (ColumnHeader.SubItemIndex = .SortKey) Then
            If .SortOrder = lvwAscending Then
                .SortOrder = lvwDescending
            Else
                .SortOrder = lvwAscending
            End If
        Else
            .Sorted = True
            .SortKey = ColumnHeader.SubItemIndex
            .SortOrder = lvwAscending
        End If
        .Refresh
    End With

    ' If an item was selected prior to the sort,
    ' make sure it is still visible now that the sort is done.
    If Not lvwCustomer.SelectedItem Is Nothing Then
        lvwCustomer.SelectedItem.EnsureVisible
    End If

End Sub
Next, we will look at the ListView's role in cmdSave_Click event. We looked at this Sub earlier to examine the ADO/database aspects of the code; now we will look at it to examine the ListView aspects of the code.
A ListItem object variable, objNewListItem, is declared at the local level. This will be used on the "ADD" side (i.e., if we are saving a newly added record). On the "ADD" side, after we have set up the SQL to do an INSERT, we use the Add method of the ListItems collection to add a new ListItem. The reference to the new ListItem is assigned to the objNewListItem variable. Note that the first name that has been entered into the txtFirst textbox is used for the Text property of the newly added item. The next statement calls the programmer-defined Sub PopulateListItem, passing it the newly added ListItem as an argument (the code for PopulateListItem will be shown a little later below, but all it does is assign the values of the textboxes used in the add or update to the corresponding SubItems of the ListItem object passed in to the Sub). Following this, the new Customer ID (that was established when GetNextCustID was called) is assigned to the corresponding SubItem of the new ListItem. The EnsureVisible method is invoked to ensure that the user can see the newly added item. The SelectedItem property is then set to reference the newly added item. To clean things up, the objNewListItem variable is then set to Nothing.
On the "UPDATE" side, our job is to modify the SubItem values of the currently selected item to reflect the user's changes. Here, we get the value for the lngIDField variable from the "hidden" Cust ID column of the currently selected ListItem of the ListView. This variable is then used in the building of the UPDATE SQL statement. We then set the Text property of the currently selected item to the first name entered in the txtFirst textbox, and then we call the PopulateListItem Sub, passing the the currently selected ListItem.
The code for the "cmdSave_Click" event procedure is shown below, with the ListView-related code in bold:
'-----------------------------------------------------------------------------
Private Sub cmdSave_Click()
'-----------------------------------------------------------------------------

    Dim strPhone        As String
    Dim objNewListItem  As ListItem
    Dim lngIDField      As Long
    Dim strSQL          As String

    If Not ValidateFormFields Then Exit Sub

    strPhone = txtArea.Text & txtPrfx.Text & txtLine.Text

    If mstrMaintMode = "ADD" Then

        lngIDField = GetNextCustID()

        strSQL = "INSERT INTO Customer(  CustID"
        strSQL = strSQL & "            , FirstName"
        strSQL = strSQL & "            , LastName"
        strSQL = strSQL & "            , Address"
        strSQL = strSQL & "            , City"
        strSQL = strSQL & "            , State"
        strSQL = strSQL & "            , Zip"
        strSQL = strSQL & "            , PhoneNumber"
        strSQL = strSQL & "         ) VALUES ("
        strSQL = strSQL & lngIDField
        strSQL = strSQL & ", '" & Replace$(txtFirst.Text, "'", "''") & "'"
        strSQL = strSQL & ", '" & Replace$(txtLast.Text, "'", "''") & "'"
        strSQL = strSQL & ", '" & Replace$(txtAddr.Text, "'", "''") & "'"
        strSQL = strSQL & ", '" & Replace$(txtCity.Text, "'", "''") & "'"
        strSQL = strSQL & ", '" & txtState.Text & "'"
        strSQL = strSQL & ", '" & txtZip.Text & "'"
        strSQL = strSQL & ", '" & strPhone & "'"
        strSQL = strSQL & ")"

        Set objNewListItem = lvwCustomer.ListItems.Add(, , txtFirst.Text, , Custs")
        PopulateListItem objNewListItem
        With objNewListItem
            .SubItems(mlngCUST_ID_IDX) = CStr(lngIDField)
            .EnsureVisible
        End With
        Set lvwCustomer.SelectedItem = objNewListItem
        Set objNewListItem = Nothing
    Else
        lngIDField = CLng(lvwCustomer.SelectedItem.SubItems(mlngCUST_ID_IDX))

        strSQL = "UPDATE Customer SET "
        strSQL = strSQL & "  FirstName   = '" & Replace$(txtFirst.Text, "'", ''") & "'"
        strSQL = strSQL & ", LastName    = '" & Replace$(txtLast.Text, "'", ''") & "'"
        strSQL = strSQL & ", Address     = '" & Replace$(txtAddr.Text, "'", ''") & "'"
        strSQL = strSQL & ", City        = '" & Replace$(txtCity.Text, "'", ''") & "'"
        strSQL = strSQL & ", State       = '" & txtState.Text & "'"
        strSQL = strSQL & ", Zip         = '" & txtZip.Text & "'"
        strSQL = strSQL & ", PhoneNumber = '" & strPhone & "'"
        strSQL = strSQL & " WHERE CustID = " & lngIDField

        lvwCustomer.SelectedItem.Text = txtFirst.Text
        PopulateListItem lvwCustomer.SelectedItem
    End If

    mobjCmd.CommandText = strSQL
    mobjCmd.Execute

    SetFormState True

    mblnUpdateInProgress = False

End Sub
The code for the programmer-defined Sub "PopulateListItem" (discussed above) is shown below:
'-----------------------------------------------------------------------------
Private Sub PopulateListItem(pobjListItem As ListItem)
'-----------------------------------------------------------------------------

    With pobjListItem
        .SubItems(mlngCUST_LAST_IDX) = txtLast.Text
        .SubItems(mlngCUST_ADDR_IDX) = txtAddr.Text
        .SubItems(mlngCUST_CITY_IDX) = txtCity.Text
        .SubItems(mlngCUST_ST_IDX) = txtState.Text
        .SubItems(mlngCUST_ZIP_IDX) = txtZip.Text
        .SubItems(mlngCUST_PHONE_IDX) _
            = IIf(txtArea.Text = "", _
                  "", _
                  "(" & txtArea.Text & ") " & txtPrfx.Text & "-" & txtLine.Text)

    End With

End Sub
The last bit of ListView-related code we will look at is in the cmdDelete_Click event procedure. In the first section of highlighted code, we use the SelectedItem to get the first and last name of the customer to be deleted so that we can present the message "Are you sure that you want to delete Customer so-and-so?"; we also get the Cust ID for use in building the SQL string. Provided that the user goes ahead with the delete, we must refresh the ListView accordingly: we are going to remove the currently selected item, and we also want to establish a "new" selected item (we will store the index of the new selected item in the variable lngNewSelIndex). We first test to see if the item to be deleted is the last item of the ListView if it is, then the "new" selected item's index will be one less than currently selected item's index (for example, if you have five items and you delete the fifth one, the "new" last item will be the fourth one) otherwise the "new" selected item's index will be the same as the currently selected item's index (for example, if you have five items and you delete the third one, the item that was previously fourth will now be third). The selected item is then removed with the Remove method of the ListItems collection. Provided that we did not delete the very last record of the table, we set the "new" selected item (using the value of the lngNewSelIndex variable) and then call the lvwCustomer_ItemClick event procedure, passing it that new item which will cause the textboxes to be populated with the data from the newly selected item.
'-----------------------------------------------------------------------------
Private Sub cmdDelete_Click()
'-----------------------------------------------------------------------------

    Dim strFirstName    As String
    Dim strLastName     As String
    Dim lngCustID       As Long
    Dim lngNewSelIndex  As Long

    If lvwCustomer.SelectedItem Is Nothing Then
        MsgBox "No Customer selected to delete.", _
               vbExclamation, _
               "Delete"
        Exit Sub
    End If

    With lvwCustomer.SelectedItem
        strFirstName = .Text
        strLastName = .SubItems(mlngCUST_LAST_IDX)
        lngCustID = CLng(.SubItems(mlngCUST_ID_IDX))
    End With

    If MsgBox("Are you sure that you want to delete Customer '" _
            & strFirstName & " " & strLastName & "'?", _
              vbYesNo + vbQuestion, _
              "Confirm Delete") = vbNo Then
        Exit Sub
    End If

    mobjCmd.CommandText = "DELETE FROM Customer WHERE CustID = " & lngCustID
    mobjCmd.Execute

    With lvwCustomer
        If .SelectedItem.Index = .ListItems.Count Then
            lngNewSelIndex = .ListItems.Count - 1
        Else
            lngNewSelIndex = .SelectedItem.Index
        End If
        .ListItems.Remove .SelectedItem.Index
        If .ListItems.Count > 0 Then
            Set .SelectedItem = .ListItems(lngNewSelIndex)
            lvwCustomer_ItemClick .SelectedItem
        Else
            ClearCurrRecControls
        End If
    End With

End Sub
Download the project files for this sample application here.